Friday, December 25, 2020

Quiche, small and simple

There is something about quiche that makes me coming back to it. I think it is the custardy texture, and the umami that leaps out of a good slice of quiche. There are downsides, the main one being that a quiche can be really fatty and salty. One can make making and baking the crust infinitely complicated. All recipes assume a standard pie dish, or a 10 or 12 inch cast iron skillet, presumably making sure than an army can be well fed. Even though quiche does make great leftovers, making a smaller and lighter quiche has been something I have been after for a while.


The breakthrough was realizing that my 8 inch cast iron skillets have been collecting dust instead of being used as a fine baking dish. It is exactly the size that I have been looking for - the picture below shows what was left over after Jasna and I each had a slice.

Let me record the recipe here, so that I don't need to invent the wheel over and over again.

Ingredients for the crust

  • 1 cup flour: I used 1/2 cup rye and 1/2 cup millet flour
  • Optional but very useful: 1 TBS psyllium husk mixed in 4 TBS of water
    • The husk adds elasticity to the dough and helps it hold together.
  • 1/2 tsp salt
  • 1/4 cup ice water
  • 1/4 cup oil: I tend to use olive oil

Ingredients for the custard:

  • 3 large eggs
  • 3/4 cup milk: I used 1/4 cup soy milk and 1/2 cup whole milk
  • parsley: a handful, chopped finely
  • cheese, 1/2 cup or so: I used shredded parmesan, chèvre, and a touch of mystery aged cheese

Method:

  1. Preheat the oven to 375 F
  2. If using psyllium husk, mix the husk with 4TBS water and let it stand for 2 minutes or so.
  3. In a bowl, mix all the ingredients for the crust. Knead the soft dough to mix everything well.
  4. Grease the skillet with butter. Oil does not stick to the sides all that well, hence I prefer using butter.
  5. With your fingers, press the dough into evenly thick layer against the bottom and the sides of the skillet. Make sure the dough is not thicker around the inner edge of the skillet - where the sides and the bottom come together.
  6. Bake the crust for 15 minutes. Note: With this dough I have never needed to weigh it or to pierce it with a fork.
  7. Keep the oven going after the crust is prebaked, and take the skillet out. Remember to use oven mitts.
  8. In a bowl, maybe the same one that you used for the crust, whisk the eggs, and then whisk in the milk and parsley.
  9. Pour the mixture into the skillet. 
  10. Add the cheese. I used a spoon and my hands to break off small pieces of chevre, I sprinkled some parmesan, and dotted the quiche with some aged cheese for extra flavor.
  11. Stir the cheese and the milk mixture just a bit. 


  12. Bake at 375 F for 35-40 minutes, until the custard has firmed up and got some color. It may puff up a bit,  but will deflate as the air bubbles cool down.
  13. Cool the quiche just a bit and  use a spatula or a fish turner to take the quiche out of the skillet easily.
Note:

Feel free to add bacon, ham, steamed vegetables and so on. I have realized that we prefer to keep it simple, just eggs, cheese, and herbs for extra flavor and color.

There is no need to add salt to the eggs. The cheese will supply enough salt.


Friday, November 27, 2020

Potato pancakes with ricotta and celeriac

When I named this blog "Trivial food", I gave the name quite a bit of thought. Through the years my notion of good food shifted from "fancy with exotic ingredients" to the challenge that with good-quality every-day ingredients one should be able to make spectacular food.

Today I am pretty confident that we met the challenge. Our daily food is largely plant-based, vegetables and legumes abound, preparations require fairly basic techniques and a manageable dose of attention. Yet, every time when we go to a fancy restaurant we pretty much shrug and acknowledge it is for the experience. The quality of food we consume on the daily basis tends to meet the bar consistently. 

Thinking of dining experience, let me add an unsolicited plug for Sierra Mar, the restaurant at Post Ranch Inn. The food is beautiful and really well prepared, the ingredients are top notch, the service is ridiculously non-pretentious, and the view makes you extend a lunch to a two-hour event. That is something I cannot reproduce at home!


The topic of this post, however, are potato pancakes. A dish that must be trivial, it's really just grated potatoes mixed with a few additives and cooked on a griddle. Yet, around Hanukkah, every year internet surfaces an abundance of recipes and advice for how to make latkes or the pancakes perfectly. After looking at various recipes and making the dish several times, I do believe potato pancakes do qualify as trivial food. To get there, they need an uncommon twist.

That is, there are two key steps to making really good potato pancakes . The main one is to eliminate the excess moisture from the potatoes. In the original post I suggested squeezing the liquid out of grated potatoes with a paper towel. That is the standard method that works well, but it makes the pancakes trickier to cook so that they are cooked inside and not burned on the outside. 

Recently I saw a recipe recommending to use leftover mashed potatoes for the pancakes, and that gave me an idea: Cook or bake the potatoes first, then grate them and use that to make potatoes. I turned to my trusty instant pot, steamed russet potatoes for 10 minutes and graded them when they cooled down. Note that steaming results in incomparably better potatoes than boiling, and with an instant pot, it is much faster and reproducible than baking. I also decided to replace the flour with starch (corn, potato, tapioca) dissolved in a bit of cold water to help with crispiness. The result were literally perfect potato pancakes without any fuss or preparation challenges whatsoever. Very satisfying.

The second secret was to cook the pancakes at a medium to medium-low heat, slowly enough so that the outside only gets crispy and not burned while the inside is fully cooked. That recommendation stays even when using steamed potatoes. We still want to minimize the opportunity to burn the pancakes, and we still need to allow the egg and the cornstarch to cook through.

Ingredients for about 8 pancakes, enough for two hungry people:

  1. Two russet potatoes, peeled and grated
  2. One egg, whisked
  3. One tablespoon of corn starch mixed with a tablespoon or two of cold water
  4. Optional: One teaspoon of baking soda
  5. A pinch of salt
  6. Cooking oil - I prefer extra virgin olive oil
Method:
  1. Steam the potatoes in an instant pot (or any handy pressure cooker) for 10 minutes, with natural release.
  2. When the potatoes are cold enough to handle, peel them - the skin will come off with ease.
  3. Grate the potatoes
    1. If you do not have the pressure cooker, grate the peeled raw potatoes, squeeze the grated potatoes in a paper towel to remove the excess moisture
  4. Mix all the ingredients in a bowl
  5. Heat a large pan with a few TBS of oil on medium
  6. When the pan is hot and the oil "dances" in the pan, add the potato mix, about 2 TBS per pancake
  7. Wait for the pancakes to set and separate from the pan easily, then lower the heat to medium-low
  8. Flip the pancakes periodically, cook until golden and cooked through
For topping:
  1. Peel and cut celeriac to small cubes, about 1/5 inch. I used about 1/2 of a large celeriac.
  2. Peel 5 or so garlic cloves and cut them into three roughly even-sized pieces.
  3. Heat olive oil in a pan, and add celeriac cubes and garlic, and season with a pinch of salt
  4. Cook on medium to medium-low until both celeriac and garlic are cooked through, about 15 minutes
Serving:
  1. Smear a teaspoon of Dijon mustard on a cooked and warm pancake
  2. Top with about 2 TBS ricotta. Spread the ricotta over the pancake.
  3. Top with a couple of TBS of cooked celeriac-garlic mixture.
  4. If you wish, garnish with some chopped parsley and drizzle with a good olive oil


Sunday, October 25, 2020

Hungarian goulash with extra paprika

I grew up just across the border from Hungary, and in general, in Slovenia, Hungarian goulash tends to be a popular not-so-fancy dish. Way back in college, I was expecting friends for a visit, and I told them proudly that I was going to make them goulash. The reaction was polite but but bursting with enthusiasm. Little did they know that I got my hands of a package of venison, and that I was making a special goulash with mushrooms and pieces of bread, no paprika. I still remember the popped eyes when I revealed my humble dish.

Little did I know that with a bit more knowledge and experience one can transform the run-of-the-mill Hungarian goulash into something truly outstanding. I recently made a particularly successful version, failed to take a picture, but it is still worthwhile to record some notes. The picture above shows the chicken drumstick version of goulash. Here are key pieces of insight:

  • Use the right kind of meat. Stewing meat works well in the US (get grass-fed if you can), leg of lambs works surprisingly well (but do trim away all that fat), or any tough cut such as beef chuck. I prefer smaller chunks of meat, an inch sized or so.
  • Use LOTs of sweet paprika, add smoked paprika, crushed fennel seeds, and some chili flakes to round up the flavor.
  • Paprika needs to be gently fried in oil, that transforms the flavor from raw to smooth and deep.
  • You need some acidity, and tomato paste does very well in this department.
  • A pressure cooker works great, but do not overcook: 20 minutes with natural release seems to be hitting the spot for me.
Ingredients:
  • cooking oil
  • 1 medium onion, chopped to medium
  • 3-5 garlic cloves, minced
  • sweet paprika - 3-6 TBS
  • smoked paprika - 2-4 TBS
  • crushed fennel seeds - 1/2 TBS
  • meat - I tend to use one or two 1lb packages of stewing beef we get shipped from Richards Grassfed Beef, or the same amount of leg of lamb
  • tomato paste - a small 6oz (170g) can
  • water or dashi
  • salt, peper, and/or miso to taste
  • 1 tsp potato starch (cornstarch is OK) mixed with 1-2 TBS water
Method:

Note: I prefer sauteing in a pan, and using Instant pot just for pressure cooking, I feel I get more control that way. There is no need to share my preferences.
  1. In a large pan, e.g. a wok, saute onions with some cooking oil until they soften. Adding a pinch of salt and a few grinds of black pepper speeds up the process and adds a layer of flavor.
  2. When the onion is soft, add the spices. Add a bit more oil of the mixture dries out completely. Fry the spices for a minute on a medium heat.
  3. Add garlic, saute for 30 seconds.
  4. Add the meat that you have already seasoned with salt and pepper. Sautee the meat for a few minutes and stir it around to get it well coated with the spices.
  5. Add water or dashi to cover the meat, and the tomato paste and deglaze the pan, mix well to break up the tomato paste.
  6. Transfer everything into your pressure cooker.
  7. In my 6qt instant pot, I cook goulash for 20 minutes, with natural release.
  8. When the pressure has dropped, open the pressure cooker, and add the potato/corn starch mixture. The liquid should be hot enough for the starch to cook. If not, use the saute on medium heat function to thicken the sauce.

Sunday, October 11, 2020

Modern take on Slovenian refried potatoes AKA renstan krompir

 "Renstan (or tenstan) krompir" translates as roasted potatoes or better as pot-fried potatoes. I prefer refried potatoes in an homage to refried beans as the basics of the preparation are similar. Just that we go easy on spices - salt and pepper only - and we don't really mash the potatoes. We could play in both areas, but not in this post.


Ingredients:

  • Potatoes: 1 medium per person. In Slovenia we would use at least 3 potatoes per person. I prefer Yukon/yellow style waxy potatoes.
    • This dish can work very well with russet potatoes, but those need to be steamed whole.
  • Onion: 1 per person, or more.
  • Extra virgin olive oil
  • Salt and optionally pepper
Method:

  1. In parallel steam the potatoes and fry the onions so that they are well on their way to caramelization:
  2. I start with the onions:
    1. Slice onions thinly, or chop them to a small to medium dice. 
    2. Add a few TBS of olive oil to your cooking vessel. I prefer my ceramic wok or a carbon steel pal, but really any decent pan will do
    3. Heat the oil on medium heat, add the onions and season with a good pinch of salt
    4. Stir periodically as the onion soften and start changing the color. Reduce the heat if the onions are burning. Add more oil if the onions are drying out.
  3. Prepare potatoes while the onions are cooking:
    1. Add a cup of water to the pressure cooker, eg. Instant Pot
    2. If you use waxed potatoes
      1. Peel and cut potatoes to 1/4 inch cubes, or more traditionally into 1/4 inch slices.
      2. Put potatoes into a steaming basket
      3. Steam the potatoes under high pressure for 4 minutes. 
      4. Use quick pressure release for the potatoes
      5. Uncover the pot and take the steaming basket from the Instant Pot
    3. If you use russet potatoes:
      1. Wash the potatoes and add them, whole, to the steaming basket
      2. Steam the potatoes under high pressure for 10 minutes. 
      3. Let the pressure drop naturally, or for at least 10 minutes
      4. Take the potatoes out of the steaming basket and let them cool sufficiently so that you can handle them by hand easily
      5. Peel the potatoes - the skin should mostly just come off - and cut them into 1/4 inch slices
  4. When onions are soft and brown, add the potatoes cooked, add the potatoes to the onions.
  5. Season with salt to taste, and optionally a little pepper - note that potatoes steamed without salt.
  6. On a medium heat, keep frying and folding the potato-onion mixture. 
  7. Be patient, after a while the potatoes will start browning and the mixture will start resembling a nicely made potato pancake. 
  8. Stop cooking before the mixture starts to burn. You can get the potatoes reasonably crispy and onions even more caramelized, but there is no need to push this too far and burn the dish.
Notes:

As with every traditional recipe there are variations, and everyone knows best what is truly traditional. In this case, variations seem rather limited - one either uses pork fat/cracklings or onions, or both. Our household was of the onion variety, and Jasna's was into cracklings.

In the modern days when common feeding methods reduced omega-3 in pork we tend to avoid pork fat despite the undeniable fact that pork fat rules and that it is tasty. Hence we switched to extra virgin olive oil, which gives the good old refried potatoes a nice flavor kick, while also likely being the healthiest oil to cook with

The second variation is how we cook potatoes. Our moms would cook the potato whole, then peel it, and then fry it. Since we discovered the deliciousness of potatoes steamed under pressure in Instant pot, that has been our go-to potato-cooking method.

The cooking vessel for onions and potatoes matters, though one can use pretty much anything if there are no other distractions. That is, the potato-onion mixture takes a while to cook. If I want to use less fat, I resort to my ceramic non-stick wok. With some more fat, a carbon steel or a cast iron pan works well, as well as a stainless steel pan. I tend to go with the wok because it gives me additional safety, and yes I can caramelize onions in that wok very nicely.

Sunday, September 20, 2020

Tomato sauce notes

I think making tomato sauce has to be one of the cooking topics that may approach religious beliefs. Hence I have some trepidation to share my notes, though I do want to have the notes recorded, the result has been consistently evoking "WOW!" reactions. 

This is how we make tomato sauce. Notes are added below the recipe.

Ingredients:

  • Onion, chopped finely. 
  • Optionally: carrots and celery, chopped finely
  • Tomatoes, whole, washed. We use organic dry-farmed tomatoes we procure from our CSA farmer.
  • Extra virgin olive oil
  • Salt.
WHAT, NO QUANTITIES? Yes, that is true. You develop your own preferences. Besides, I never measure. Here is an approximation: For 10 lb tomatoes we would use 1 super large, or two large, or 3 regular size onions. A handful of carrots, and a handful of celery. Two large pinches of salt. Probably 1/3 cup olive oil.

Method:
  1. In a food processor, chop up onions finely. Add carrots, and celery if you are using them. 
    • Pause a few times and scrape the walls of the food processor. Do not worry if you get a mush, in this case it doesn't matter.
    • You can do the chopping by hand if you prefer. If your food processor is too small, do it in batches.
  2. Add a good amount of olive oil to a deep pan, heat it at medium high, be careful not to get to a smoking point.
  3. Add the mirepoix mixture, stir, add a large pinch of salt, stir again.
  4. While the aromatics are softening up, fill up your blender with washed tomatoes. Blend them finely.
    • No need to panic when the blended tomatoes get the ugly pink color. They will soon return to the ever so satisfying deep red color.
  5. Stir the aromatics periodically until they start turning yellow.
  6. Add the blended tomatoes to the pan.
  7. Blend more tomatoes, and add them to the pan, until you have used up all the tomatoes that you plan to use.
  8. Add another large pinch of salt, stir the sauce.
    • The amount of salt is your choice. Remember that simmering will reduce the sauce, so use less salt than what you may think is necessary. Plus, you don't want the salt to overpower the flavor of tomatoes.
  9. Bring the sauce to a simmer, and simmer slowly for as short as 30 minutes to as long as you want, we do it for about 3 hours. 
    • IMPORTANT: Stir periodically, e.g. at least every 20 minutes or so, depending on your pan and stove. Burned tomato sauce is a giant disappointment. I set an alarm as a reminder every time I stir.
    • Lower the heat gradually as the sauce gets thicker. This will minimize splashing, and will also reduce probability of burning the sauce.
    • Shorter simmer yields more sauce with a fresher taste
    • A long simmer produces a much smaller yield, but a super rich deep flavored thick sauce. We prefer that.
  10. Consume it fresh, preserve the rest, share with friends.

Notes

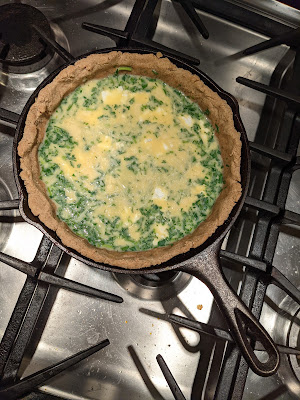
Tomato sauce has uses far beyond pasta dishes and pizza - though those present excellent opportunities for application of the red goodness. Below are a few examples: Flat bread with tomato sauce and sauteed pappers, with a poached egg. Shakshuka takes a new dimension when one uses a really good tomato sauce. Ground beef with padron peppers takes on tanginess and sweetness from tomato sauce. The simplest of all, which I don't even have a picture of, a slice of bread with tomato sauce, roasted garlic, and maybe a touch of mozzarella. Then there are soups and stews...


Clearly, one always needs to have a supply of tomato sauce ready. Should one buy it in a store? Make it from canned tomatoes? Make it from tomato paste? This is what we have chosen, simply because the result beats by a large margin everything we have been able to procure, and because this way we have full control and can use the best ingredients possible.


One may ask whether the choice should be freezing or canning. If you have sufficient freezer space, the question is answered - freeze. The reason is simple - when canning, it is recommended to add a touch of citric acid to prevent botulinum toxins being formed. Which is sad. One works so hard to create sweetness in the tomato sauce, and then takes it down a notch for the sake of safety. We freeze some tomato sauce, but we don't have enough freezer space to freeze it all, so we turn to canning. To be honest, the end result still beats anything we have purchased by a healthy margin.

Blending is a big time saver with no negative effects

Making tomato sauce takes the time as is, but at least while the sauce is simmering, one can do other things, and an alarm can remind you when to stir the sauce. We used to peel tomato skin, deseed the tomatoes, chop them by hand or smash them with a cooking spoon. All of that takes the time and effort and is messy. 

Eventually I gave up and simply threw the whole tomatoes into our blender and gave it a go. The result was a terrifyingly pink tomato liquid  - the picture really does not do the ugliness the justice.


I panicked appropriately, turned to my old friend Google, and quickly learned that there was nothing to worry about. At the sauce cooks, it really does turn into the satisfyingly deep red color. We have a powerful Vitamix blender and run it at the highest speed. That blends the skin properly, and also blends the tomato seeds. The end result is indistinguishable from the method when one peels and seeds the tomatoes - a decisive win for the blender.


We use a ceramic wok!

The slow simmer evaporates the water, and I believe it also caramelizes tomatoes to a point, they become much sweeter. To evaporate the liquid, one needs a vessel with a large surface. We started out by using a roasting pan, and we even tried roasting the sauce in the over for hours and hours, and we also tried using the pan over two burners. It all worked, but the runaway winner is a 14-inch ceramic (non-stick) wok. The shape of the wok maximizes the evaporation surface. The usual carbon steel wok would not like being exposed for hours to a simmering acidic tomato mixture - at best you'd need to reseason the wok. At worst, the tomato sauce may take on some metal taste - I have read about that, thought my experience has been that cooking tomato sauce in a cast-iron pan works just fine. So we turned to ceramic non-stick woks - a 14-inch wok is good for 10lb of tomatoes. They don't burn easily - a huge plus - and the cleanup requires no effort.

We add spices when we use the sauce

We don't add any spices or garlic to the sauce. This way the sauce stays generic and can be used for anything. We add garlic, herbs, or dry spices such as smoked paprika and cumin when we use the sauce. For example, for shakshuka, we fry smoked paprika and cumin on a bit of olive oil, then add the tomato sauce and bring it to the simmer.

If you have a thick sauce, you can dilute it

The sauce we make is quite thick. Not quite tomato paste thick, but much thicker than anything we have ever purchased. This makes it great for a topping for bread, or even with pasta, there is only concentrated flavor.

But sometimes one needs more liquid: Back to the shakshuka example. We like to cook some greens in the tomato sauce, and when we use collard greens, or red-beet greens, or lacinato kale, one needs more liquid to cook the vegetables and not burn the sauce. So we add some water, or dashi, or bean-cooking liquid, any kind of stock, and dilute the sauce enough to get the greens cooked without burning.

What tomatoes to use?

I believe the tomatoes we get are Early Girl, dry farmed. Meaning that the irrigation they get is from the morning mist. Those tomatoes are smaller, and pack an amazing flavor as is. Many recipes recommend using Roma or other plum tomatoes because those tomatoes are less juicy. I'd say get the best tomatoes you are able to buy and you can afford them.

Purchased sauce is cheaper, and inferior

Making your tomato sauce is not necessarily a money saving measure. For us, I think it comes to about $5 per 16 ounce jar just for the ingredients. Admittedly, one can buy tomato sauce for way less money and with way more convenience.


Sunday, July 26, 2020

Radish kimchi - with or without scallions

We became more familiar with Korean food through our several Korean friends, and that of course includes developing the taste for kimchi. One of our favorite stories from our fantastic vacation in Korea is from a simple eatery in Seoraksan national park where the owners could not believe we were not only able to eat their spicy kimchi, we asked for an extra serving, which is quite customary in Korea. That made a shockingly positive impression on the unbelievably kind people running that eatery. And yes, the food was simple yet so good that we went back to the same place.

It is very easy to buy kimchi almost anywhere, and kimchi we can buy is very good, but... One day we were having a dinner with a friend in one of the local Korean restaurants. Their kimchi was out of this world, I think it was by far the best part of a very good meal. So we asked what their source was, and, with a smile, we heard they made it themselves. I resolved instantly to challenge myself and see what I can do.

Radish kimchi is slightly simpler to make than napa cabbage kimchi, so that is what I have been working on first. I need to give credit to My Korean Kitchen web site that I used as the baseline for what I do - my adjustments are minor. 

Note that green onion is a part of every kimchi recipe that I have seen. Once I did not happen to have any green onions, so I made kimchi with radish only, and it was very good. Since then I have been treating scallions as optional.

Ingredients - radish:
  • 2.5 pounds (1 kg) radish - any korean, daikon, any variety of white radish will do.
  • 2 TBS coarse salt, or rock salt
  • 2 TBS sugar
  • 2 TBS Korean chili flakes (gochugaru)
  • Optional: 3-4 green onions
Ingredients - Kimchi base:
  • 1/2 to 1 onion roughly diced
  • 1/2 to 1 apple, cored and diced
  • 3 TBS fish sauce (Korean, Thai, anchovy sauce all work well), or you can use brined shrimp if your Korean friends bring them for your from Korea
  • 1 TBS garlic, minced
  • 1/2 TBS ginger, minced
  • 2 TBS Korean chili flakes, or more or less, depending on your taste
  • 1/4 cup water
  • 1 Tbsp rice flour (grind some rice in a coffee grinder if you don' have rice flour)
Method:
  1. Peel the radish and cut it into 1/2 inch (1cm) cubes. I prefer smaller pieces many of my Korean friends make the pieces a bit larger. 
  2. Mix the radish, salt, and sugar in a bowl and let stand at the room temperature for an hour. A few hours is just fine.
  3. Make the rice porridge: Boil the water and the rice flour in a microwave, about a minute tends to work well, I whisk the mixture mid way. The result should be a somewhat runny porridge.
  4. Blend all the kimchi base ingredients and the porridge in a blender or a food processor
  5. If using, chop roughly the green onions
  6. After an hour or so, drain the radish and rinse it a few times, then let is sit in a colander for a few minutes to drain
  7. Transfer the radish into a large mixing bowl, and mix it with Korean chili flakes.
  8. Add the kimchi base, and if using, the green onion, and mix it well so that the base sticks to the radish cubes
  9. Transfer kimchi into an air-tight container - I prefer glass, but use whatever you have.
  10. Leave the kimchi at the room temperature for 6 hours to 2 days to ferment. My preference is 2 days.
  11. Transfer the kimchi to the fridge where the fermentation will slow down. Wait at least a day before eating it.
  12. Share with friends. That what makes kimchi particularly tasty.

Sunday, July 19, 2020

Gluten-free Danish Apple and Prune Cake with a less memorable amount of butter

I have not really watched Food Network since I was a grad student, apart from a show here and there when I remembered to turn on a TV in a hotel room, which I often do not do. From what I can see, the programs on the Food Network have tilted towards competitions and explorations. In the early days, most of the shows focused on how to make things, with lots of instruction, and revealing many cooking principles. I learned tons from the daily "Cooking live" - not the recipes, but what was behind them.

The show that I remember with the biggest smile was called Two Fat Ladies. I wonder whether these days such a name would even be possible for a TV program. The hosts were indeed two ladies, and I was sure they had never seen a recipe with too much butter or too much bacon.

That show was where I first came across the Danish Apple and Prune cake. I baked one following the recipe they shared, and the amount of fat was so high that it was hard to eat. But it was memorably tasty, enough that I decided to make some adjustments, and that turned into a resounding success. The dish is still far from light, but reducing the amounts of butter and sugar, and increasing the amount of prunes, I believe led to an improvement. I also started to use millet four to make the cake gluten-free, and we find that to be an improvement as well.


Ingredients for the batter:
  • 2 eggs, beaten
  • 3 oz (90g) unsalted butter at room temperature - the butter has to be soft
  • 4 oz (110g) sugar
  • 4 oz (110g) almond flour or ground almonds
  • 3 oz millet flour (or any neutral-tasting flour including all-purpose flour)
  • 1 tsp baking powder
  • 1/4 tsp baking soda
  • pinch of salt
  • 1/2 to 1 cup of milk - your call, with more milk the cake will rise more, but I kind of like it denser.
  • 1 tsp vanilla extract
Ingredients for the topping:
  • 12 or so roughly chopped prunes. Scissors make chopping prunes very easy.
  • 4 oz (110g) chopped walnuts or pecans
  • 1-2 TBS sugar
  • 1-2 apples, cored and cliced
Ingredients for the final phase of baking:
  • 1-2 TBS sugar
  • ground cinnamon
  • optional small cubes of unsalted butter, about 1 TBS
Procedure:
  1. Preheat oven to 375F
  2. Butter a 10 inch round pan. I use a 10-inch cast-iron skillet
  3. Cream all ingredients for the batter. I use a whisk, a few pulses in a food processor are OK too.
  4. Pour the batter into the baking pan and spread it evenly.
  5. Scatter the prunes evenly across the batter.
  6. Mix the sugar and the walnuts (or pecans) and spread the mixture evenly on top of the batter.
  7. Arrange apple slices on top of the nut-sugar mixture.
  8. Bake for 40 minutes
  9. Take the cake from the oven, sprinkle it with sugar and cinnamon, and if you really want to, dot with some butter.
  10. Bake for additional 20 minutes, or until the skewer comes out clean.
  11. Cool, slice, and eat.
A variation I want to explore

Sometimes apples sink into the batter, especially when one uses 1 cup of milk. I wonder what would happen if I used more apples and cut apples into small chunks. That still needs exploring.


Monday, June 1, 2020

Chocolate from cacao paste

Chocolate. It really is what makes the world go around. Not much more can and should be said.

My taste in chocolate has evolved towards the dark side, now definitely going above 70% cocoa, and more usually at 85%. I've been intrigued by making chocolate from scratch, starting from cocoa beans. I have not reached that point yet, but I did finally manage to try what happens when one starts with cacao paste and cocoa butter. The result was an incredibly deep and pure chocolate flavor, which makes me wonder about ingredients in the chocolate we purchase.

Raw cacao paste, also called cacao liquor is made by crushing raw cacao beans into a liquid. This liquid quickly solidifies at room temperature and the result is cacao paste. Cocoa butter is the fat that makes up about a half of raw cocoa beans.

I watched a number of YouTube videos, read a few blog posts and finally settled on the following:
  • 100g cocoa paste, chopped roughly
  • 200g cocoa butter, chopped roughly
  • a pinch of salt - ground as finely as possible
  • 1/4 cup powder sugar
Procedure (updated on June 7, 2020)

Step 1: Melt the ingredients:
  • Put all ingredients in a metal bowl and place it over a pot of simmering water to form a double boiler.
  • While stirring and scraping continuously, melt and mix the ingredients.
  • Heat only until 120F. Use instant thermometer.

Step 2: Optionally, temper the chocolate - this will give you a snappy and shiny chocolate. Skip to the next step if you do not want to fiddle with precise temperatures.
Step 3: Fill the mold(s) and cool:
  • Pour the liquid into a container or molds and let cool solidify at the room temperature.
  • Refrigerate if you wish, but only after the chocolate has solidified.
  • Consume.

Alternatively, one can use coconut oil instead of cocoa butter. In this case, chocolate will not solidify at the room temperature, so one should keep it in the fridge.

Here is what the chocolate looked like after being poured into molds: